Introduction
 In
our house at Chester River the
projection installation was somewhat difficult because we
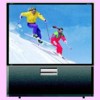
wanted to use the living room with the water view for the projection room.
This is so that we can sit and watch the water as the sun sets, then just
convert the room into a theater by pressing a button when it gets dark!
Checkout the video at the bottom of this page to see
the screen come down and the curtains close! As our
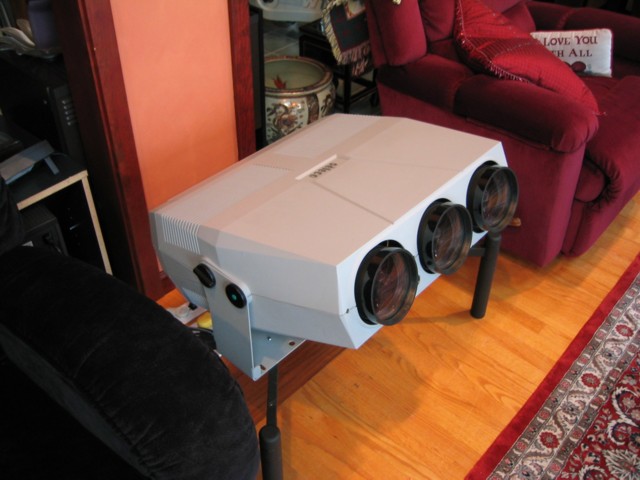
Seleco SVT-180 projector has a
fixed focal length (it has to be
a distance of 1.5 times the screen width from the screen) and the room has a
cathedral ceiling, the projector ended up sitting in between us like a pet dog
or something! As the good old Seleco was getting on for ten years old at
that point, I decided to start looking for new & smaller alternatives to solve
the problem. In
our house at Chester River the
projection installation was somewhat difficult because we
wanted to use the living room with the water view for the projection room.
This is so that we can sit and watch the water as the sun sets, then just
convert the room into a theater by pressing a button when it gets dark!
Checkout the video at the bottom of this page to see
the screen come down and the curtains close! As our
Seleco SVT-180 projector has a
fixed focal length (it has to be
a distance of 1.5 times the screen width from the screen) and the room has a
cathedral ceiling, the projector ended up sitting in between us like a pet dog
or something! As the good old Seleco was getting on for ten years old at
that point, I decided to start looking for new & smaller alternatives to solve
the problem.
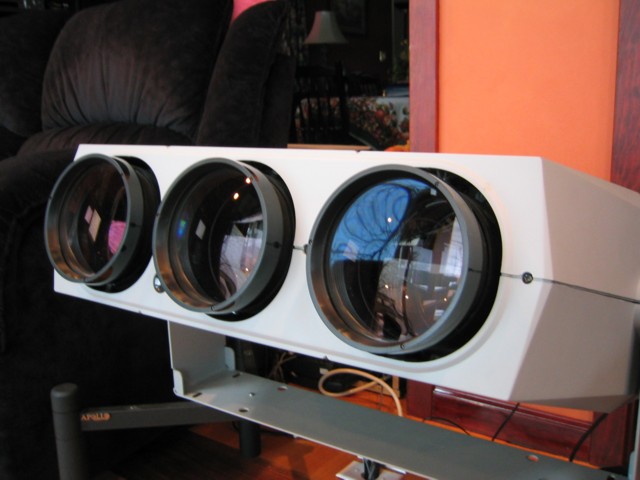
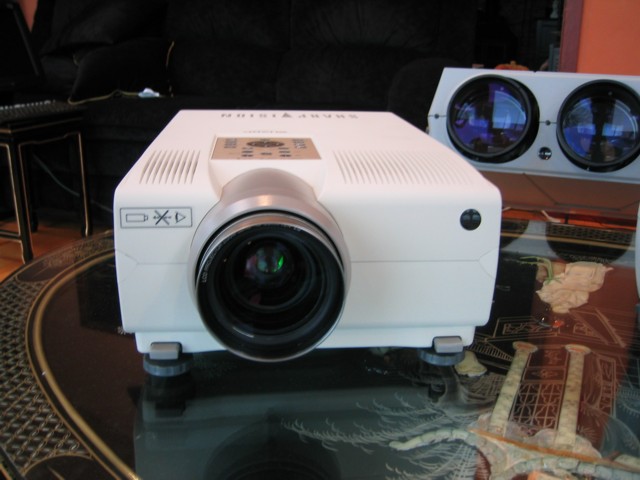
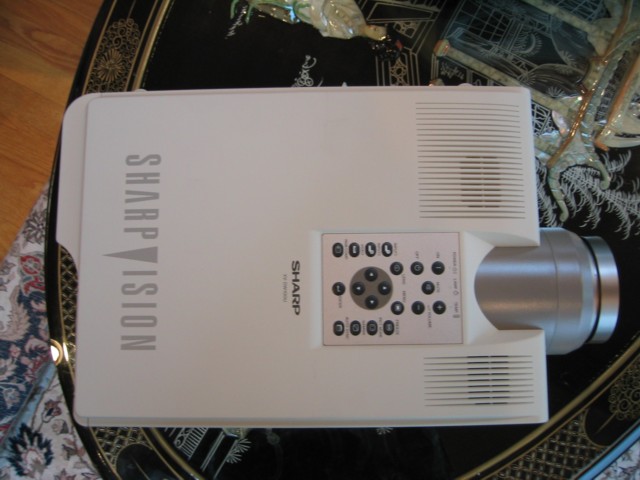
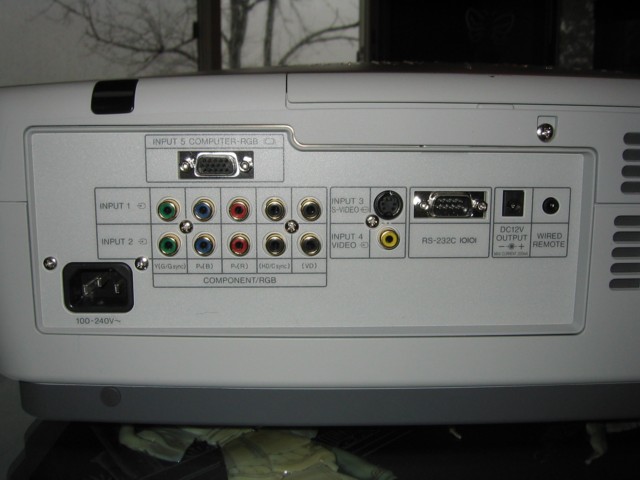
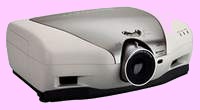
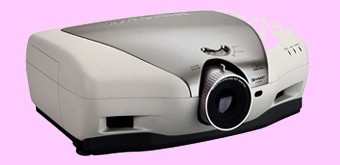
Sharp XV-DW100U Projector
As I wanted a projector that could also be used as a monitor
for the PC that controlled the stereo with my
PCRemote application, I decided to
look for a 1024x782 pixel LCD projector. After looking around a bit, I
decided to try a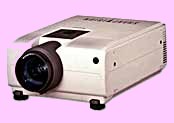 Sharp XV-DW100U. This is a three panel LCD High Definition
 projector
and when it first came out, it was quite a high-end unit costing almost $10,000!
By late 2001, it looked like I could get a factory refurbished unit for about
$4000, so I ordered one from
Reliable Audio Video an on-line dealer I had used before. When it
arrived, I was very impressed with the brightness and performance compared to
the old Seleco and I was quickly sure that I had made the right decision.
Also because the Sharp has a zoom feature, it meant that the mounting position
could be moved forward or back quite a bit. In fact it could be moved back
beyond the line of the back wall of the room! This meant that I would be
able to build a small room or more like a box for it to sit in that was actually
inside the loft behind the cathedral ceiling with the front being open to the
room. That way when the screen was rolled up, you would hardly be able to
notice that there was even a projection system in the room at all! projector
and when it first came out, it was quite a high-end unit costing almost $10,000!
By late 2001, it looked like I could get a factory refurbished unit for about
$4000, so I ordered one from
Reliable Audio Video an on-line dealer I had used before. When it
arrived, I was very impressed with the brightness and performance compared to
the old Seleco and I was quickly sure that I had made the right decision.
Also because the Sharp has a zoom feature, it meant that the mounting position
could be moved forward or back quite a bit. In fact it could be moved back
beyond the line of the back wall of the room! This meant that I would be
able to build a small room or more like a box for it to sit in that was actually
inside the loft behind the cathedral ceiling with the front being open to the
room. That way when the screen was rolled up, you would hardly be able to
notice that there was even a projection system in the room at all!
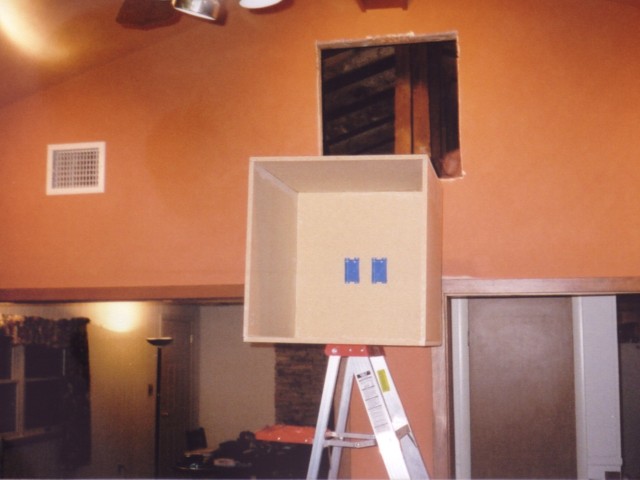
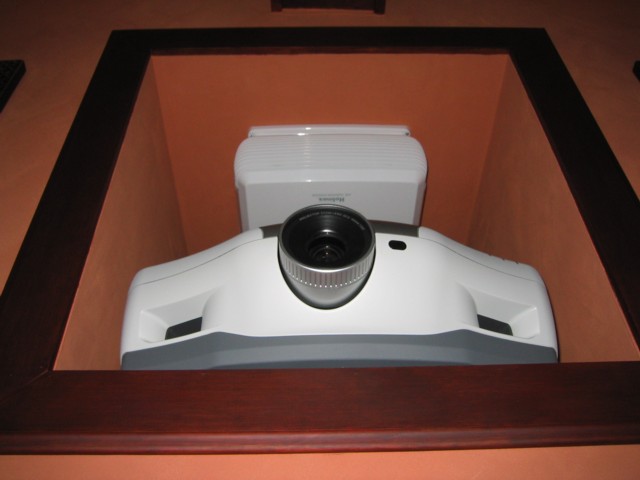
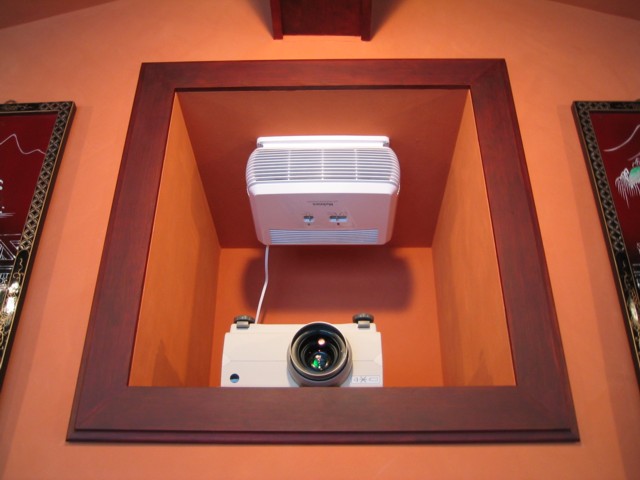
The Projection Box
 The
box I made is simply constructed from 5 pieces of 24 X 24 X 3/4 inch chipboard
from Lowes
glued and screwed together to form a cube with one side open and two receptacle
boxes at the back for the The
box I made is simply constructed from 5 pieces of 24 X 24 X 3/4 inch chipboard
from Lowes
glued and screwed together to form a cube with one side open and two receptacle
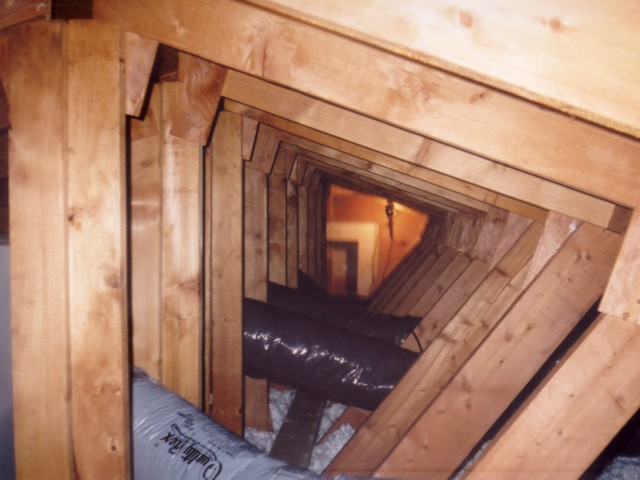
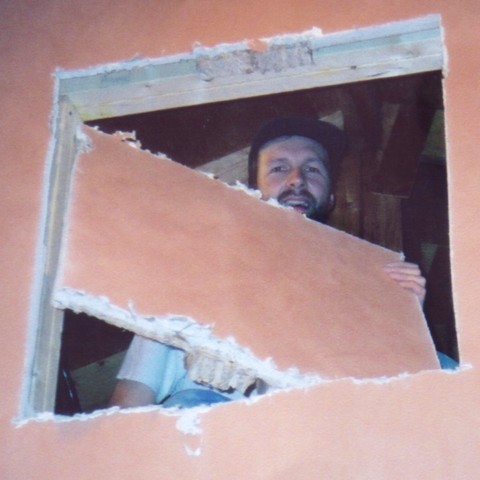
boxes at the back for the power, control and video cables. Next I made a frame to support the weight
of the roof as the whole for the box needed to be in the center of the apex of
the cathedral ceiling wall where the support for the main beam is. Due to
space constraints in
the loft, I made this from three separate frames made from 2 X 4 inch wood
and built and inserted them in one at a time as the existing supports were
removed. In fact the existing supports were just two pieces of 4 X 2 going
from the
power, control and video cables. Next I made a frame to support the weight
of the roof as the whole for the box needed to be in the center of the apex of
the cathedral ceiling wall where the support for the main beam is. Due to
space constraints in
the loft, I made this from three separate frames made from 2 X 4 inch wood
and built and inserted them in one at a time as the existing supports were
removed. In fact the existing supports were just two pieces of 4 X 2 going
from the
 floor
of the loft to the centre beam. This is typical of what you find in an
American wooden frame house! Next I had to cut out the whole floor
of the loft to the centre beam. This is typical of what you find in an
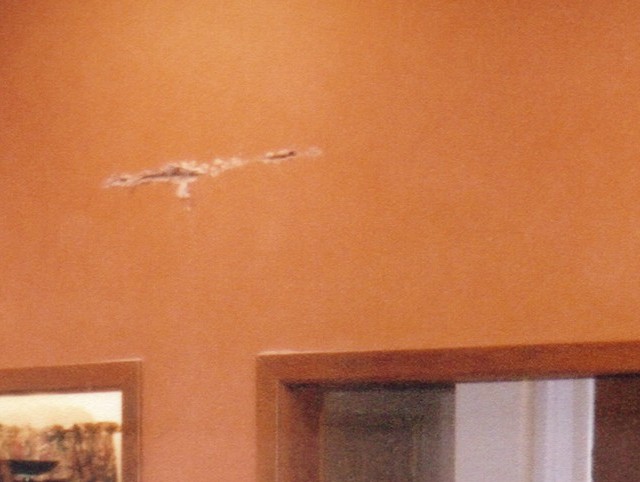
American wooden frame house! Next I had to cut out the whole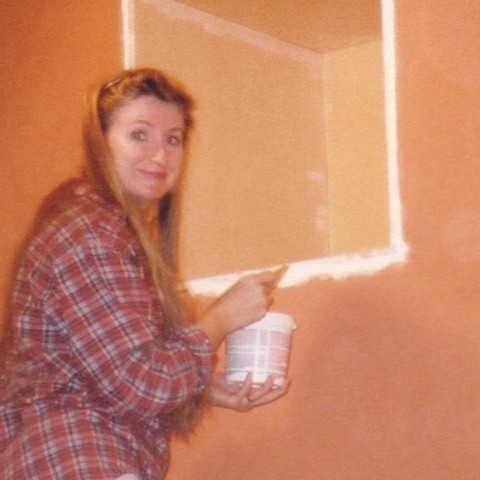 which turned out to be quite easy although it made a bit of dust in the living
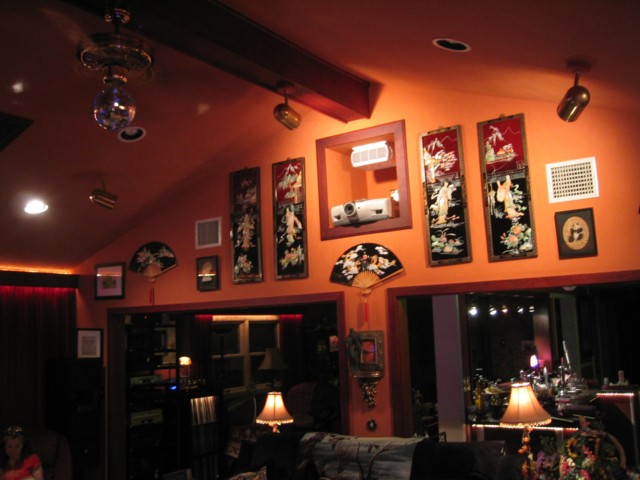
room! After the square section of drywall was removed, the box was put in
and fixed in place by securing it to the frame. Then Susan filled in the
edges with plaster and painted the whole box to match the existing walls.
Once the outside frame was added and stained, the whole thing just looked like a
two foot square picture frame and blended into the room perfectly. Next, I
added a small Holmes air purifier/fan that I got from
Walmart. This has an electronic ionizer and a carbon HEPA filter to
clean and
which turned out to be quite easy although it made a bit of dust in the living
room! After the square section of drywall was removed, the box was put in
and fixed in place by securing it to the frame. Then Susan filled in the
edges with plaster and painted the whole box to match the existing walls.
Once the outside frame was added and stained, the whole thing just looked like a
two foot square picture frame and blended into the room perfectly. Next, I
added a small Holmes air purifier/fan that I got from
Walmart. This has an electronic ionizer and a carbon HEPA filter to
clean and
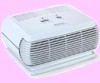 circulate
the air in the box as the projector is not designed to be trapped in a confined
space like that. The fan is fitted upside down and is screwed to the
ceiling of the box. When the projector is operating, the fan is turned on
via an
X10 appliance module.
Next the projector was installed. Because the
Sharp XV-DW100U is designed to be either floor mounted with the bottom of
the lens level with the bottom of the screen, or on a ceiling with the bottom of
the upside down lens level with the top of the screen, the projector had to sit
on it's back on the floor of the box with it's feet sticking up in the air,
level with where the ceiling would be if there was one. circulate
the air in the box as the projector is not designed to be trapped in a confined
space like that. The fan is fitted upside down and is screwed to the
ceiling of the box. When the projector is operating, the fan is turned on
via an
X10 appliance module.
Next the projector was installed. Because the
Sharp XV-DW100U is designed to be either floor mounted with the bottom of
the lens level with the bottom of the screen, or on a ceiling with the bottom of
the upside down lens level with the top of the screen, the projector had to sit
on it's back on the floor of the box with it's feet sticking up in the air,
level with where the ceiling would be if there was one.
Installing the Sharp XV-DW100U Projector
 So,
once the box was made and everything was setup it was time to tryout the
Sharp XV-DW100U in the final installation. I powered it up and nothing
happened except the odd click! By messing about and removing and replacing
the lamp I managed to get it to startup. Once it was going it looked
fantastic! It had good brightness and worked well with Laserdisc, DVD and
the VGA connection to the computer. After watching a couple films though,
I noticed what looked like a yellow stain stretching from the center to one side
of the picture. As it had also failed to start a couple more times, I
decided to get it replaced or fixed. Unfortunately as it had now been a
few weeks since I first purchased the projector from
Reliable Audio Video, the 30 day return period had expired, so I called
Sharp about it to see what could be done under the warranty. To cut a long
story short, I'll just list the sequence of events that then ensued all of which
was paid for by Sharp under the terms of the
Refurbished Products
Consumer Limited Warranty and involved two repair centers, Sharp's local
agent Certified Electronic Service Inc in Ellicott City MD 21042 and Sharp's own
repair facility in Romeoville IL 60446. There were 14 FedEx shipments in
all! So,
once the box was made and everything was setup it was time to tryout the
Sharp XV-DW100U in the final installation. I powered it up and nothing
happened except the odd click! By messing about and removing and replacing
the lamp I managed to get it to startup. Once it was going it looked
fantastic! It had good brightness and worked well with Laserdisc, DVD and
the VGA connection to the computer. After watching a couple films though,
I noticed what looked like a yellow stain stretching from the center to one side
of the picture. As it had also failed to start a couple more times, I
decided to get it replaced or fixed. Unfortunately as it had now been a
few weeks since I first purchased the projector from
Reliable Audio Video, the 30 day return period had expired, so I called
Sharp about it to see what could be done under the warranty. To cut a long
story short, I'll just list the sequence of events that then ensued all of which
was paid for by Sharp under the terms of the
Refurbished Products
Consumer Limited Warranty and involved two repair centers, Sharp's local
agent Certified Electronic Service Inc in Ellicott City MD 21042 and Sharp's own
repair facility in Romeoville IL 60446. There were 14 FedEx shipments in
all!
Certified Electronics:
1. Replaced blue LCD panel (a $1000 item!), could not find lamp start
problem. I returned unit, same problems.
2. Replaced green LCD panel (another $1000!), could not find lamp start
problem. I found that the convergence was all screwed up so I contacted Sharp.
Sharp:
3. Cleaned & reset the convergence but ignored the lamp start problem.
After this the picture was indeed fantastic and I was really pleased but then
the lamp failed again!
4. Cleaned & reset the convergence and fixed the lamp driver. Ahh!!!
The convergence was all messed up again!!
5. Cleaned & reset the convergence. Ahhhhh!!!!!! The convergence was
worse than ever!
6. Cleaned & reset the convergence. Ahhhhh!!!!!!! They must have Stevie
Wonder doing this?
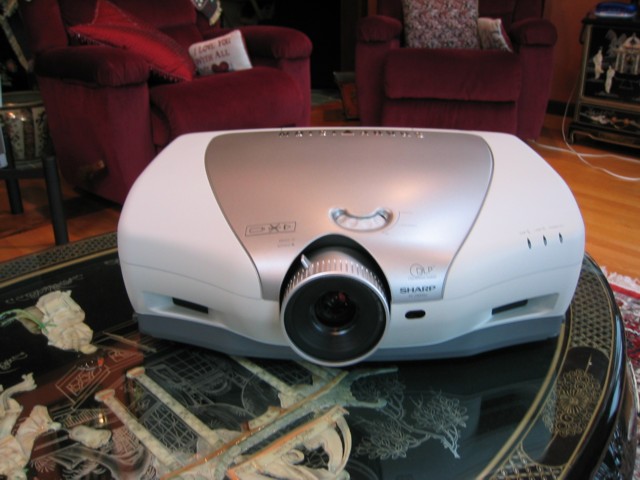
Sharp XV-Z9000U Projector
At this point I demanded a new unit fresh from Japan and offered to pay the
difference. It took quite some effort to get Sharp to agree to this and I
had to swear at and humiliate three levels of Sharp customer service
representatives before getting to the decision maker, a lady called Pam Rogel.
After all this, the
XV-DW100U was out of production and only other refurbished units were
available so I had to have an
XV-Z9000U which is a 16:9 widescreen aspect ratio
DLP projector. I wasn't too
happy about the widescreen aspect but there appeared to be no other choice.
7. Sharp ships another refurbished
XV-DW100U by mistake.
Oh, another
XV-DW100U for me to play with! Sharp were calling UPS all day to try
and get the package back, but I signed for it thinking I would find my
XV-Z9000U. This
XV-DW100U showed one thing though: It's a great projector! Again this
one had perfect convergence and a brilliant picture! Just one thing
though: It had one green pixel that was always on quite close to the centre of
the picture. In dark scenes it looked ridiculous, so I unplugged it ready
to return. Apparently at the time at least, Sharp would only consider an
LCD panel to be faulty if three or more pixels were faulty. As far as I am
concerned, once you are in the $10,000 league, perfect panels are what I expect!
8. Sharp ships a new
XV-Z9000U
The next day the
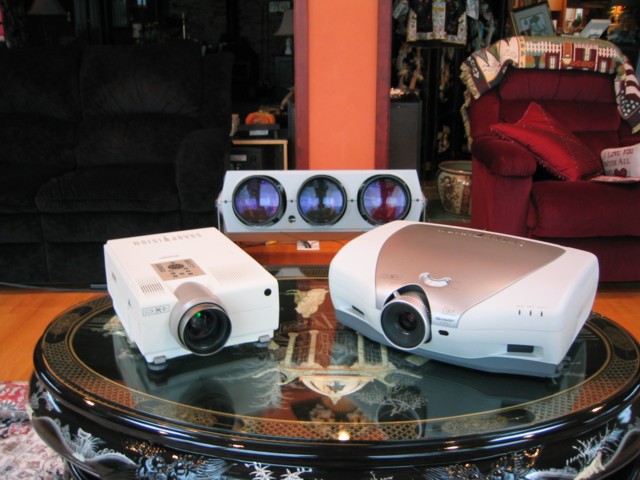
XV-Z9000U arrived. Wow!! Holy cow etc. etc.. What a
difference DLP makes!! The
brightness while not quite as good as the LCD
XV-DW100U was still impressive but the depth of contrast and the blazing
deep colors just blew me away. Running the
XV-DW100U and the
XV-Z9000U together side by side on the same screen, I just couldn't work out
how I had ever been satisfied with the
XV-DW100U? Also with DLP
(in these Sharp units & most others) there is only one chip that does the red,
green & blue on a time sharing basis using a rotating color wheel, so there will
never be any convergence issues between three separate panels.
 So,
confident that everything was OK at last, I took down the temporary setup I had
made to compare the two projectors and installed the
XV-Z9000U in the projector box. Because the
XV-Z9000U has a lens shift feature that can move the entire picture
vertically so that either the top or bottom of the picture can be level with the
lens, it meant that it could sit properly, feet down in the projector box unlike
the
XV-DW100U that had to sit with it's feet pointing upwards as described
above. We settled down to watch our first
DLP powered anamorphic DVD.
As the theatrical animated logos flashed light and dark before us I actually
considered starting the film again so I could watch the brilliant colors in the
Dolby Digital trailer once again. But just then as the brightest and
deepest colored Dolby Digital symbol I had ever seen stopped rotating in the
blazing light, I noticed a dark spec on the screen! Well we often get the
odd fly trapped in the screen as it rolls up, so I thought I'd just go up there
and flick it off seeing as everything else was so perfect. As I approached
the screen looking at the dark spot, a feeling of dread crossed me as if someone
had walked over my grave... It's a fly, it's a beetle, it's a nit, it's a
spot of dirt... Oh please let it be... As I pulled at the edge of the screen to
see the spot move with the screen... No! No! It can't be... Ahhhhhhh!!!!!!!!!!
Yes, the spot was part of the picture, it's a DEAD PIXEL
!!! Further investigation with a blue screen image showed a total of
three such dead DLP pixels.
I spent the rest of the film looking for for any other faults and drinking as
much beer as I could to calm my nerves!
The next day, I reluctantly called Sharp to give them the bad news.
Basically they said they have never ever heard of such a thing although
sometimes there were cases where the
DLP chip was not seated correctly
and a whole row or column of pixels would not be working, but this looked like a
fault with the chip itself. As they were so desperate to satisfy me at
that point, they immediately dispatched another new
XV-Z9000U to replace it. So,
confident that everything was OK at last, I took down the temporary setup I had
made to compare the two projectors and installed the
XV-Z9000U in the projector box. Because the
XV-Z9000U has a lens shift feature that can move the entire picture
vertically so that either the top or bottom of the picture can be level with the
lens, it meant that it could sit properly, feet down in the projector box unlike
the
XV-DW100U that had to sit with it's feet pointing upwards as described
above. We settled down to watch our first
DLP powered anamorphic DVD.
As the theatrical animated logos flashed light and dark before us I actually
considered starting the film again so I could watch the brilliant colors in the
Dolby Digital trailer once again. But just then as the brightest and
deepest colored Dolby Digital symbol I had ever seen stopped rotating in the
blazing light, I noticed a dark spec on the screen! Well we often get the
odd fly trapped in the screen as it rolls up, so I thought I'd just go up there
and flick it off seeing as everything else was so perfect. As I approached
the screen looking at the dark spot, a feeling of dread crossed me as if someone
had walked over my grave... It's a fly, it's a beetle, it's a nit, it's a
spot of dirt... Oh please let it be... As I pulled at the edge of the screen to
see the spot move with the screen... No! No! It can't be... Ahhhhhhh!!!!!!!!!!
Yes, the spot was part of the picture, it's a DEAD PIXEL
!!! Further investigation with a blue screen image showed a total of
three such dead DLP pixels.
I spent the rest of the film looking for for any other faults and drinking as
much beer as I could to calm my nerves!
The next day, I reluctantly called Sharp to give them the bad news.
Basically they said they have never ever heard of such a thing although
sometimes there were cases where the
DLP chip was not seated correctly
and a whole row or column of pixels would not be working, but this looked like a
fault with the chip itself. As they were so desperate to satisfy me at
that point, they immediately dispatched another new
XV-Z9000U to replace it.
9. Sharp ships another new
XV-Z9000U
Sharp XV-Z9000U Projector Installed & Working
Well, at this point it's now over a year since I purchased the original
XV-DW100U and I am wondering what can go wrong next? As it turned out,
the final replacement
XV-Z9000U was perfect in every respect and it is still working perfectly
today with now almost 1000 hours on the lamp. It looks looks we do about
50 hours a month, so a lamp will last us three years. While the
replacement model
XV-Z10000U and even the
XV-Z12000U are getting cheaper & cheaper now, I just don't have any issues
with the
XV-Z9000U, so I think I'll get a new lamp soon and see if I can make the
projector last for a total of six years! We just had some of our
neighbors over last week to look at
some digital photographs and watch a movie. It's always fun to watch
people who have never seen a big front projection system before. Their
eyes just light up!
Click
here for more information about the projector from Sharp and
here is the
manual.
I can tell you this: Sharp do definitely honor their warrantees in the end!
Digital Light Processing
 The
DLP (Digital Light Processing)
electronics and the actual DMD (Digital Mirror Device) chip are invented and
produced by Texas Instruments. There is little point in me describing how
it works here as there is a great demo
here on the
DLP site. Suffice to say
that everything they say about it is true! As you will know from reading
this page, I have had the opportunity to directly compare CRT (Cathode Ray
Tube), LCD (Liquid Crystal Display) and now
DLP projection technology all The
DLP (Digital Light Processing)
electronics and the actual DMD (Digital Mirror Device) chip are invented and
produced by Texas Instruments. There is little point in me describing how
it works here as there is a great demo
here on the
DLP site. Suffice to say
that everything they say about it is true! As you will know from reading
this page, I have had the opportunity to directly compare CRT (Cathode Ray
Tube), LCD (Liquid Crystal Display) and now
DLP projection technology all together on the same screen at the flick of a switch in my own home. All
in all, DLP is clearly the
winner, all things considered. Unlike LCD where the pixels are square and
separated by a black grid (smudging the focus a bit on LCD can help solve this),
the pixels look like what I can only describe as spinning doughnuts! They
appear round and have a slight dip in the center and they somehow shimmer &
merge together very smoothly. In fact it is difficult to believe when
looking from the viewing position that the picture is made up of dot's at all!
Because of this, the keystone correction feature should you need to use it does
actually work and produce a good picture. The keystone correction effect
on the LCD
XV-DW100U is totally ridiculous and unusable. In addition to all this,
the 2D and 3D progressive modes on the
XV-Z9000U can make an interlaced Laserdisc look like a progressive scan DVD
and I'm not kidding! Even an old VHS tape while not as crisp of course can
still be given that progressive look & feel. A specific progressive scan
DVD player is just not needed!
together on the same screen at the flick of a switch in my own home. All
in all, DLP is clearly the
winner, all things considered. Unlike LCD where the pixels are square and
separated by a black grid (smudging the focus a bit on LCD can help solve this),
the pixels look like what I can only describe as spinning doughnuts! They
appear round and have a slight dip in the center and they somehow shimmer &
merge together very smoothly. In fact it is difficult to believe when
looking from the viewing position that the picture is made up of dot's at all!
Because of this, the keystone correction feature should you need to use it does
actually work and produce a good picture. The keystone correction effect
on the LCD
XV-DW100U is totally ridiculous and unusable. In addition to all this,
the 2D and 3D progressive modes on the
XV-Z9000U can make an interlaced Laserdisc look like a progressive scan DVD
and I'm not kidding! Even an old VHS tape while not as crisp of course can
still be given that progressive look & feel. A specific progressive scan
DVD player is just not needed!
Wide Screen or Full Screen?
 My
only issue with the projector is that is has a 720p native DMD chip intended for
720p HDTV viewing (which we never do). This means that it is 1280 x 720
pixels in size and I'd just as soon have 1024 x 768 with 1024 filling the 8 foot
width My
only issue with the projector is that is has a 720p native DMD chip intended for
720p HDTV viewing (which we never do). This means that it is 1280 x 720
pixels in size and I'd just as soon have 1024 x 768 with 1024 filling the 8 foot
width of my screen
which would make the 768 a height of 6 feet like the
XV-DW100U does. Although the
XV-Z9000U was the first DLP
projector to use this new chip and was hailed as a revolution because it could
directly support the 720p HDTV format with no rescaling, I'm just not impressed
with this letterbox thing and Sharp doesn't produce a 1024 x 768
DLP projector! So the
XV-Z9000U (and just about anything else these days) has a wide screen aspect
ratio of 16:9. Well I can tell you, it's not wider at all, it's just
shorter! Try and tell me that the blue 16x9 screen on the right is bigger
than the blue 4x3 screen on the right! Because our screen (and any front
projection screen) is of a fixed width, 8 feet in our case, the height of the
screen is now 8/16 x 9 = 4 feet 6 inches high. Anything bigger would be
ridiculous plus the projector would have to be even further back in the room
which it can't of my screen
which would make the 768 a height of 6 feet like the
XV-DW100U does. Although the
XV-Z9000U was the first DLP
projector to use this new chip and was hailed as a revolution because it could
directly support the 720p HDTV format with no rescaling, I'm just not impressed
with this letterbox thing and Sharp doesn't produce a 1024 x 768
DLP projector! So the
XV-Z9000U (and just about anything else these days) has a wide screen aspect
ratio of 16:9. Well I can tell you, it's not wider at all, it's just
shorter! Try and tell me that the blue 16x9 screen on the right is bigger
than the blue 4x3 screen on the right! Because our screen (and any front
projection screen) is of a fixed width, 8 feet in our case, the height of the
screen is now 8/16 x 9 = 4 feet 6 inches high. Anything bigger would be
ridiculous plus the projector would have to be even further back in the room
which it can't be.
The
XV-DW100U and
XV-Z9000U have the same focal length based on width, not height. Before with
a 4:3 aspect ratio the screen was 8 feet wide and 8/4 x 3 = 6 feet high!
Yes, we have lost 12 whole square feet of be.
The
XV-DW100U and
XV-Z9000U have the same focal length based on width, not height. Before with
a 4:3 aspect ratio the screen was 8 feet wide and 8/4 x 3 = 6 feet high!
Yes, we have lost 12 whole square feet of
 screen
size!! Is this supposed to be progress? As far as I am concerned,
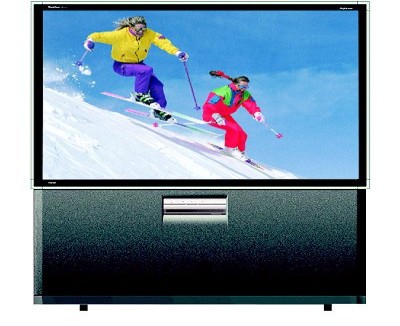
because of this widescreen is crap! Look at any 16:9 widescreen TV in any
house. To make it 4:3 aspect ratio would just add 33% to the height.
Is there really anything in the way above the TV preventing this? Again,
it's more likely that the width is the real issue. Not only that, still a
vast amount of video content is in 4:3, like music video and sports. The
enormous wide screen sides that accompany a close up of a persons face (a
component of most all films) has caused most film directors to zoom in to fill
the width with the face thereby cutting off the tops of peoples heads and their
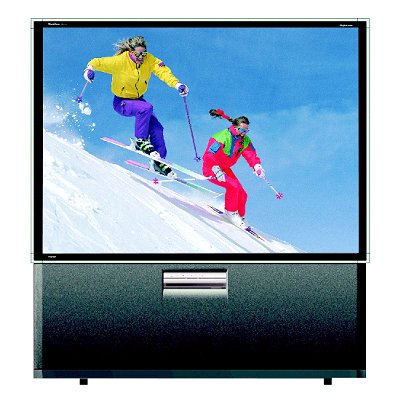
chins! What is the point? Watching a widescreen film on a
large 60 inch 4:3
TV like we screen
size!! Is this supposed to be progress? As far as I am concerned,
because of this widescreen is crap! Look at any 16:9 widescreen TV in any
house. To make it 4:3 aspect ratio would just add 33% to the height.
Is there really anything in the way above the TV preventing this? Again,
it's more likely that the width is the real issue. Not only that, still a
vast amount of video content is in 4:3, like music video and sports. The
enormous wide screen sides that accompany a close up of a persons face (a
component of most all films) has caused most film directors to zoom in to fill
the width with the face thereby cutting off the tops of peoples heads and their
chins! What is the point? Watching a widescreen film on a
large 60 inch 4:3
TV like we
 have
at our
condo raises this question in my mind
all the time? Of course, there is nothing like seeing a have
at our
condo raises this question in my mind
all the time? Of course, there is nothing like seeing a wide screen film in it's original aspect ratio (wide or otherwise) to get the
full effect, but that's only because it was made with a short, err I mean wide
shape! I guess at 8 feet wide we can afford the loss, but understand this:
a loss is indeed what it is! Then again, we appear to have no
choice as the best quality recorded video source we currently have is wide
screen
anamorphic DVD. To make matters even worse, many
anamorphic DVD's and Laserdiscs go beyond 16:9 and present wide screen films
in an aspect ratio of 1.85:1 or even 2.35:1! Why can't they just stick to
16:9? So at 8 feet wide, 2.35 comes to 8/2.35 x 1 = 3 feet 5 inches!
So to add insult to injury we now have black bars at the top and bottom of the
screen that are 6 1/2 inches high and another 8 1/2 square feet of screen
space wasted! So the total waste of screen space compared with 4:3 is now
over 20 square feet because the height is now less than 3 1/2 feet where as
before it was 6 feet. Not only that, when we look at our digital
photographs that are of course 4:3, we get black sidebars on the screen that are
a foot wide and the pictures are reduced to a width of 6 feet where as before
they would have been 8 feet wide. So people ask why the pictures are so
much smaller than on our old projector if the new projector is supposed to be so
good??!!
wide screen film in it's original aspect ratio (wide or otherwise) to get the
full effect, but that's only because it was made with a short, err I mean wide
shape! I guess at 8 feet wide we can afford the loss, but understand this:
a loss is indeed what it is! Then again, we appear to have no
choice as the best quality recorded video source we currently have is wide
screen
anamorphic DVD. To make matters even worse, many
anamorphic DVD's and Laserdiscs go beyond 16:9 and present wide screen films
in an aspect ratio of 1.85:1 or even 2.35:1! Why can't they just stick to
16:9? So at 8 feet wide, 2.35 comes to 8/2.35 x 1 = 3 feet 5 inches!
So to add insult to injury we now have black bars at the top and bottom of the
screen that are 6 1/2 inches high and another 8 1/2 square feet of screen
space wasted! So the total waste of screen space compared with 4:3 is now
over 20 square feet because the height is now less than 3 1/2 feet where as
before it was 6 feet. Not only that, when we look at our digital
photographs that are of course 4:3, we get black sidebars on the screen that are
a foot wide and the pictures are reduced to a width of 6 feet where as before
they would have been 8 feet wide. So people ask why the pictures are so
much smaller than on our old projector if the new projector is supposed to be so
good??!!
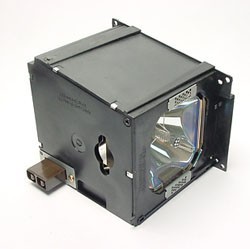
The Lamp
 Now
in April 2006 I thought I would just check to see how the lamp time is going and
it turned out to be at 1850 hours, so it looks like we do get more than three
years from a lamp! As I am still 100% satisfied with the projector and
deeply fearful of all the possible trouble in changing to another unit, I
decided it was time to get a new lamp and planned to change it at 1900 hours in
order to get another three years use from the unit. After looking on eBay
I found www.bnotions.com
and they Now
in April 2006 I thought I would just check to see how the lamp time is going and
it turned out to be at 1850 hours, so it looks like we do get more than three
years from a lamp! As I am still 100% satisfied with the projector and
deeply fearful of all the possible trouble in changing to another unit, I
decided it was time to get a new lamp and planned to change it at 1900 hours in
order to get another three years use from the unit. After looking on eBay
I found www.bnotions.com
and they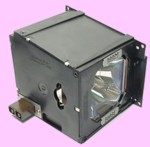 have a page
here for the lamp. At
have a page
here for the lamp. At
 $439
with free shipping, it looked like a great deal (better than eBay)! Just a
few days later, the lamp arrived shipped direct from Japan, beautifully packed
and an original Sharp replacement (AN-K9LP also known as BQC-XVZ9000/1).
So I set the new lamp aside and waited for the 1900 hour warning indication to
come up on the projector. Get this: The very next day halfway through
Jurassic Park, the original lamp exploded! So we ended up watching the
rest of the film on the PC monitor. The next day, I took the projector
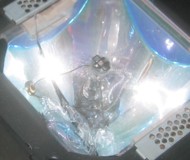
down and removed the old lamp to checkout the damage. I was most fearful
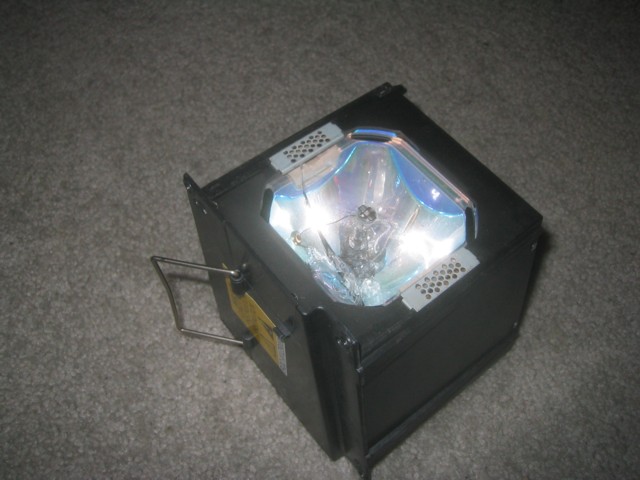
of some damage to the ballast in the power supply. The lamp looked to have
ruptured at the base of the filament where it meets the reflector and the force
of the rupture threw the filament against the back of the thick glass plate at
the front of the lamp breaking the glass in one corner (see picture above).
There was some glass left in the chamber of the projector after removing the
lamp. I just cleaned that out with a vacuum cleaner, cleaned and polished
the exposed convex side of the condensor lens and put the new lamp in.
Click here to see
the layout. It powered up first time and has been running perfectly ever
since! The lamp replacement procedure is described in the
user manual.
You can see the full service manual
here (be
patient, large 16 Meg file) and there is an upgrade supplement
here. $439
with free shipping, it looked like a great deal (better than eBay)! Just a
few days later, the lamp arrived shipped direct from Japan, beautifully packed
and an original Sharp replacement (AN-K9LP also known as BQC-XVZ9000/1).
So I set the new lamp aside and waited for the 1900 hour warning indication to
come up on the projector. Get this: The very next day halfway through
Jurassic Park, the original lamp exploded! So we ended up watching the
rest of the film on the PC monitor. The next day, I took the projector
down and removed the old lamp to checkout the damage. I was most fearful
of some damage to the ballast in the power supply. The lamp looked to have
ruptured at the base of the filament where it meets the reflector and the force
of the rupture threw the filament against the back of the thick glass plate at
the front of the lamp breaking the glass in one corner (see picture above).
There was some glass left in the chamber of the projector after removing the
lamp. I just cleaned that out with a vacuum cleaner, cleaned and polished
the exposed convex side of the condensor lens and put the new lamp in.
Click here to see
the layout. It powered up first time and has been running perfectly ever
since! The lamp replacement procedure is described in the
user manual.
You can see the full service manual
here (be
patient, large 16 Meg file) and there is an upgrade supplement
here.
Now in 2006 four years after it's introduction, the Sharp
XV-Z9000U is considered old and outdated and from an original retail price
of more than $10000, they now sell on eBay for about $1000 depending on how much
use the lamp has had. Even so, the newer units have only a small amount of
extra contrast and I still say the picture on the
XV-Z9000U is stunning and the progressive video upscaling is what really
makes it!
Pictures
Please give the video time to load! If you see black, it means it is still
downloading!
|